Logging in | General settings | Products | Logging a sale | Creators | Expenses | Royalties | Reporting
Logging in
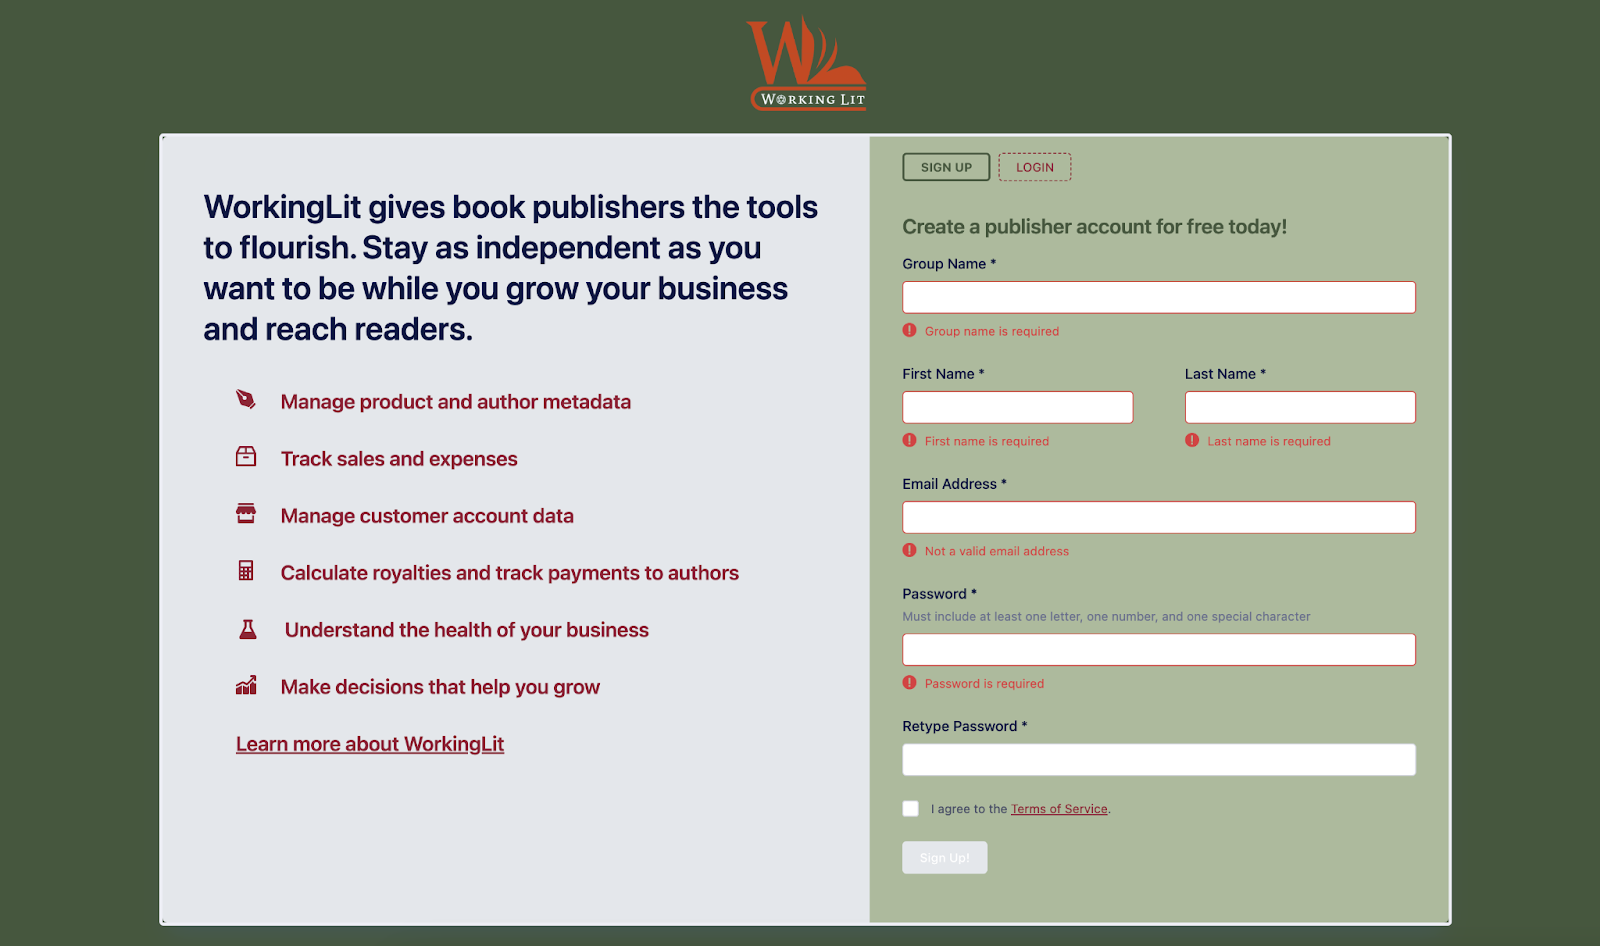
Navigate to WorkingLit.com and create an account for free by clicking “Login/Register” in the top right corner. You’ll be directed to an Account Creation screen.
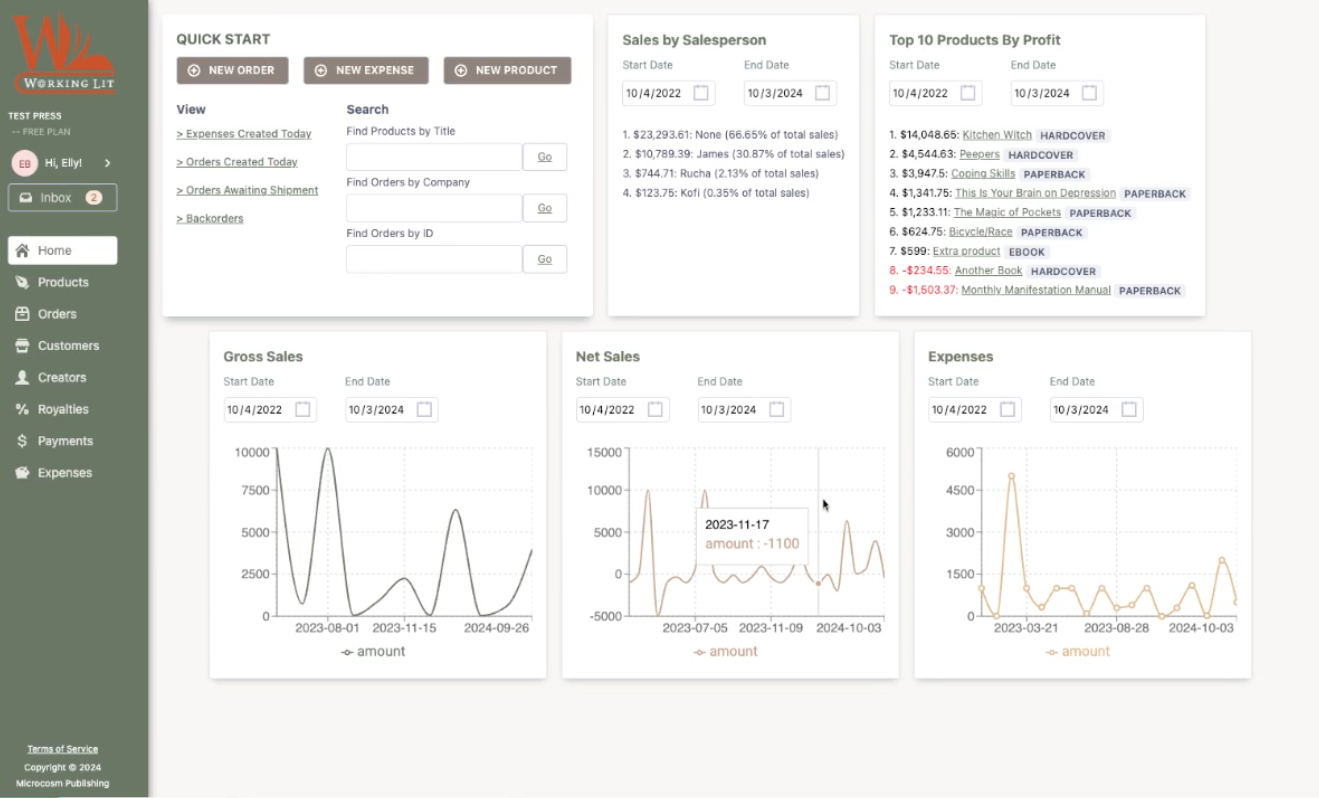
As soon as you log in, you’ll see your dashboard.Once you have it populated with titles, sales, and expenses, it’ll show you a ton of data about the health of your business.
General settings
When you log in for the first time, navigate to your settings.
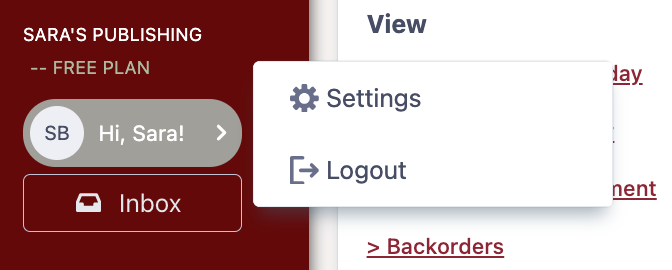
In Account Settings, you can change your password, upgrade your plan, and invite colleagues to join your account via email.
In Customization and Setup, you can determine a few variables regarding how your publisher does business:
Currency, Customer Classes, Expense Categories,Order Statuses, Royalty Payment Methods, Royalty Accounting (royalty payment timing and regional royalties)*, Payment Terms, Shipping Types, Sales People
We recommend looking over these options as soon as you start.
*Wondering how to get royalties to work for you? Check out our Royalties section for information on customizing royalties, including by region and compound royalties.
Products
Keep all your book’s metadata in one place. Here, you can upload your catalog or create new products one by one.
Click NEW PRODUCT to add a single new product. Each product field and dropdown already uses the same language as you’d need for an ONIX feed.

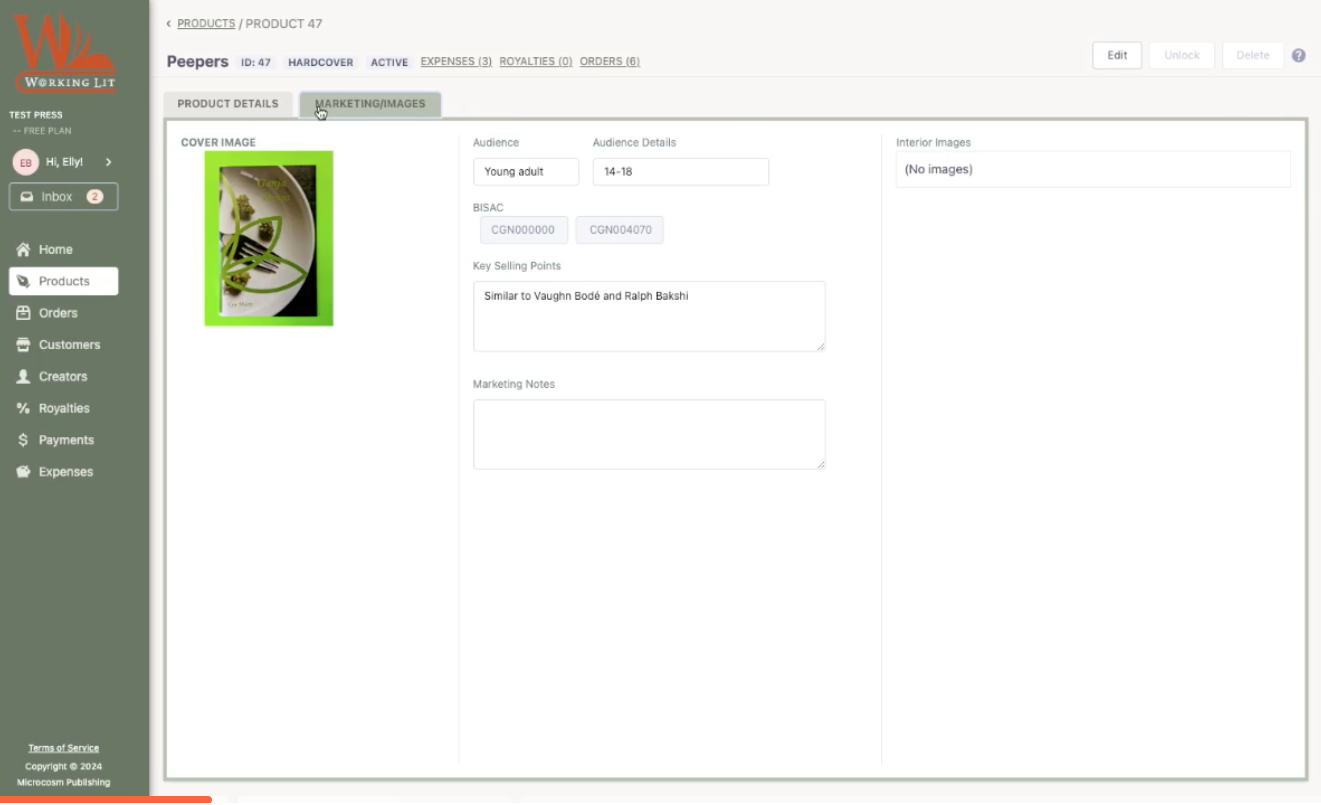
You’ll notice a second tab where you can add marketing images (cover image, interior images, etc) and additional marketing materials like BISAC codes and key selling points.
If you’d like to add another format (paperback, eBook, etc.), you can do so within the product page. Click “Add new format” and update details like ISBN and quantity.

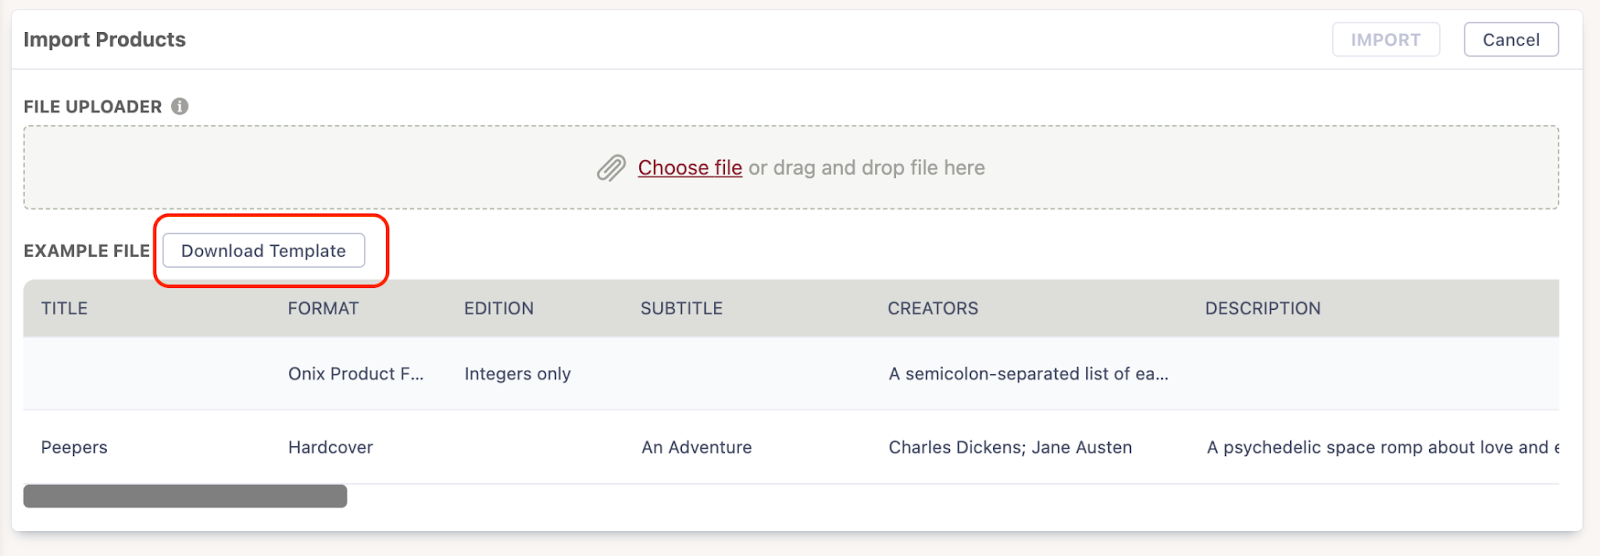
Have a large catalog? Click IMPORT PRODUCTS. Download the template, add your own data, and re-upload.
If there are any issues with your data, WorkingLit will guide you through them right away.
Note a couple great features:
- The inventory field on the individual product page: this number will reflect sales and returns as you enter those in the Orders section.
- Along the top bar next to the product title, you can see and link to any expenses, royalties, and orders associated with this product.
Logging a Sale with Orders and Customers
This is where you put in all income coming into your business through book sales.
Customers
You’ll want to start by adding a Customer (if you start an order without an existing customer, that’s alright. We’ll put in a placeholder and you can go back and edit later).
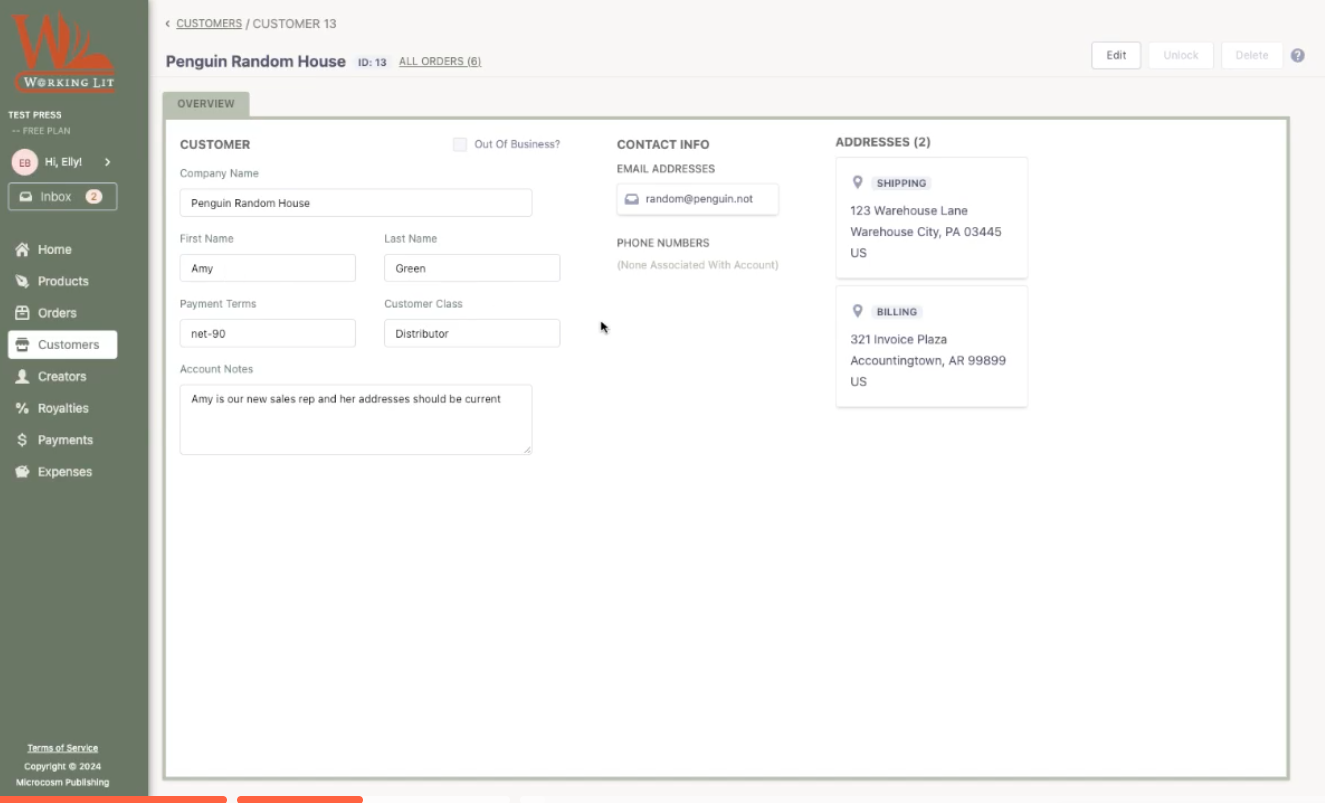
Just like with Products, Orders, and Creators, you can add customers by CSV upload OR one by one in the WorkingLit app.
You can also add in multiple addresses, shipping and billing. WorkingLit offers customizable customer classes (store, third-party vendor, distributor, etc.), which you can keep track of in Reporting (which we’ll get to later).
Orders
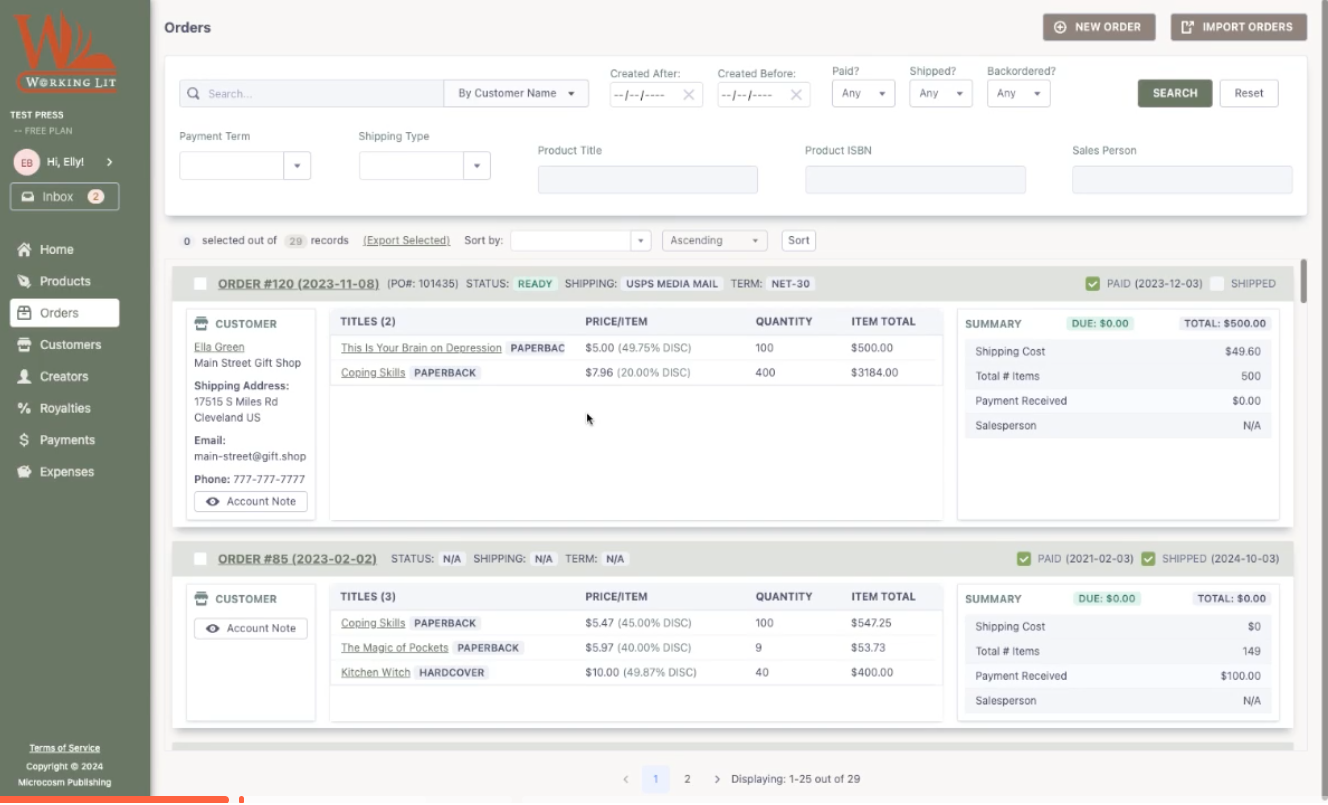
Whether you add orders in bulk or one at a time, you have plenty of options for gathering data. When adding a new order, you can customize a variety of fields with drop-downs for existing items like Product and Customer. WorkingLit can note discounts, salesperson, payment terms, and more.
Keep track of order status at your convenience. You can mark each order as paid and shipped when you create the order, or input payment/shipment dates later!
Creators
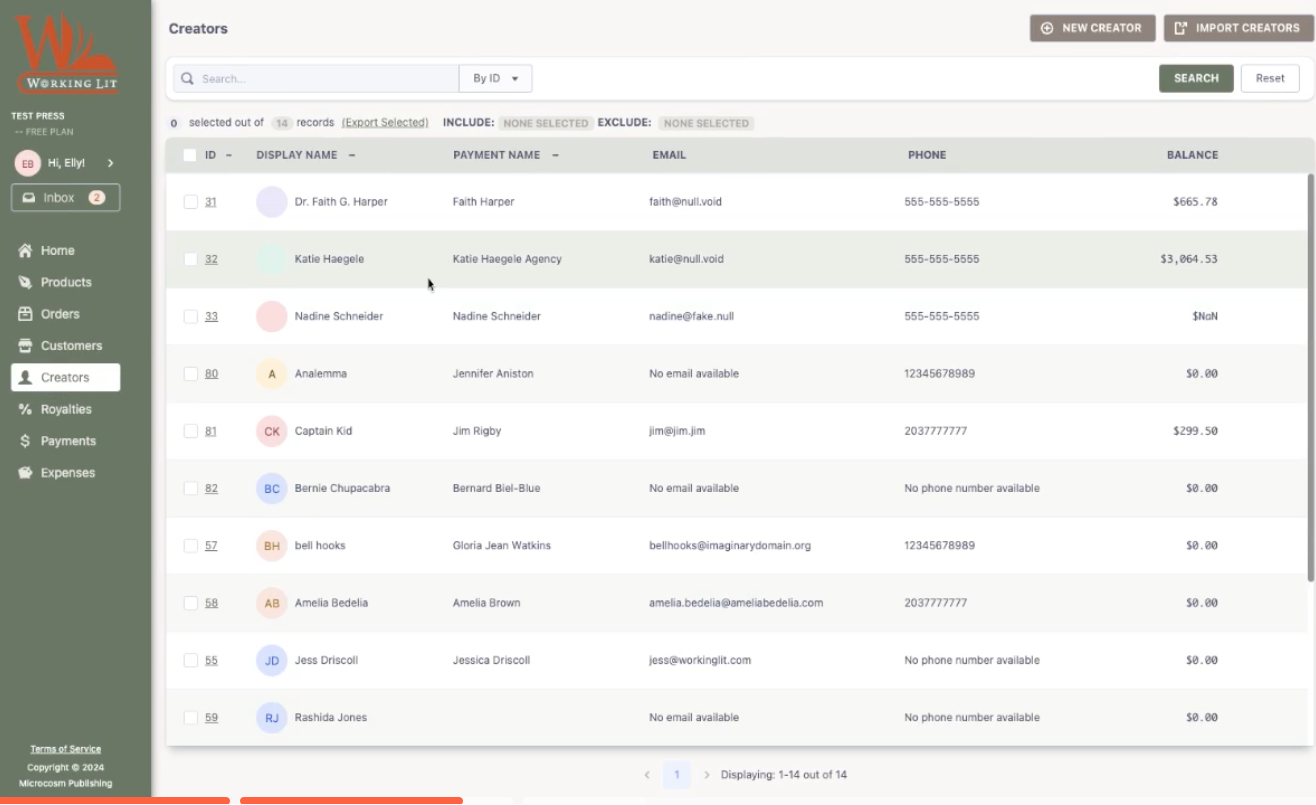
In the Creators section, you’ll manage your contributors (authors, illustrators, translators, editors, etc.). Just like the other menu tabs, you can add one at a time with NEW CREATOR or in bulk with IMPORT CREATORS. Both options can be found in the top right corner of your screen. Again, this is ONIX formatted, so you can export it as a CSV and send it wherever you need.
Click on the second tab, “Past Statements,” to access any past royalty statements associated with that creator.
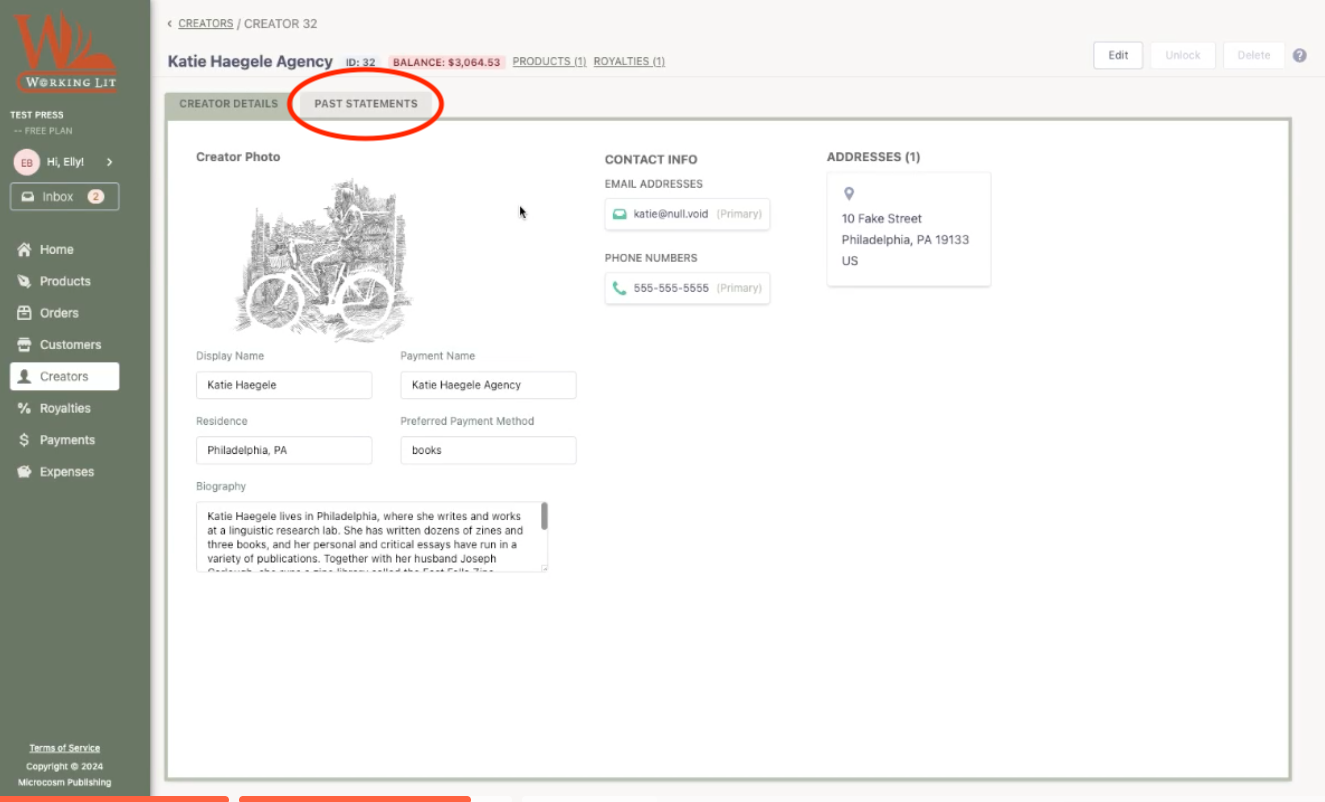
Speaking of royalties, use the Payments menu item to track payments to creators, such as advances.
Expenses
You can add expenses that are associated with a product, or with a category, or both.
Click on NEW EXPENSE to enter a payment your business has made.

Select an associated product, if one applies. Select (or add new) Expense Category. We recommend using Expense Categories that your accountant recommends so tax season is streamlined!
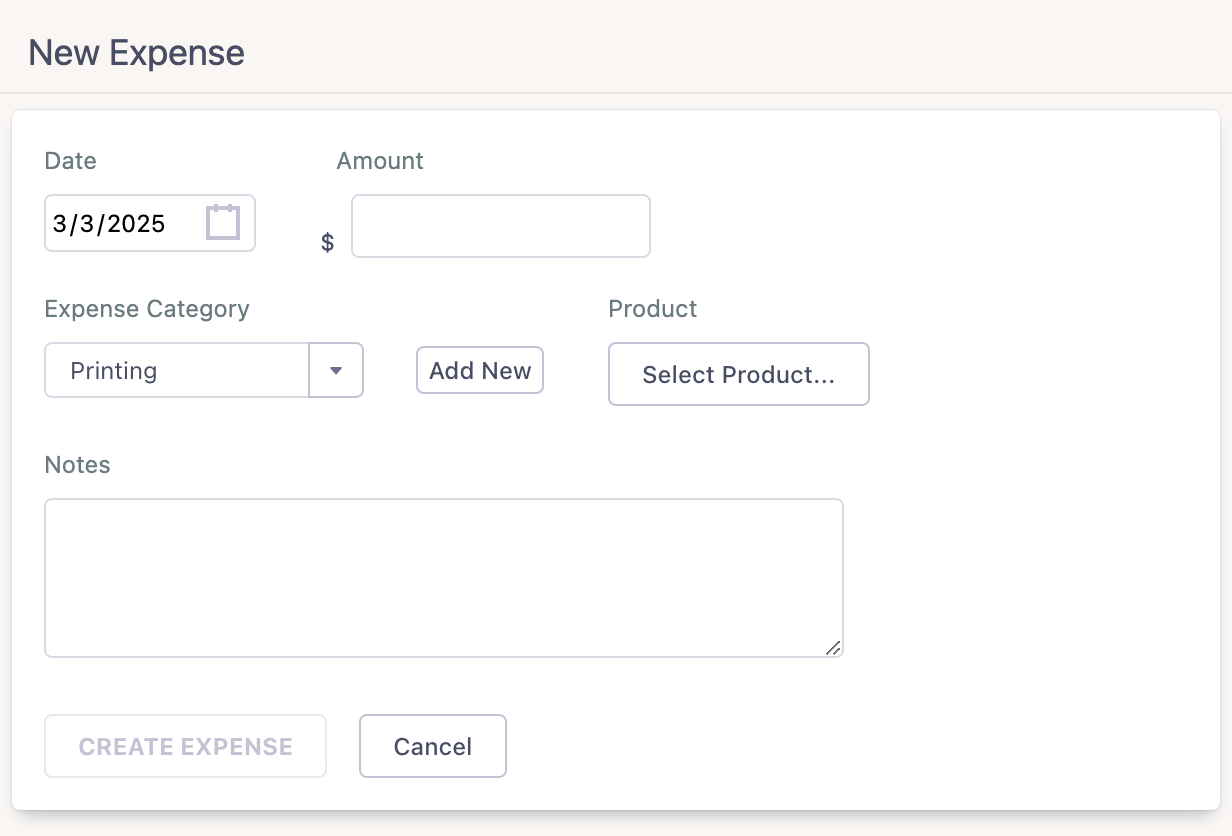
Every expense will be reflected in the Reporting section, including any royalties that deduct expenses.
Royalties
This section makes it really easy to manage any contracts that you have, without opening a single spreadsheet.
Do you have regional royalties? This means that creators might have different royalty terms depending on the region of sale of their product. If so, navigate to SETTINGS. Click on Royalty Accounting and click on the slider.
Create a new region by clicking “Add Region” and adding countries from the dropdown. Hit “save.” All other countries will remain grouped in a region called “Rest of World.”

Click on NEW ROYALTY to add terms for a new product/creator.

Then select the Creator and Product. If you use regional royalties, choose the defined region of the royalty.
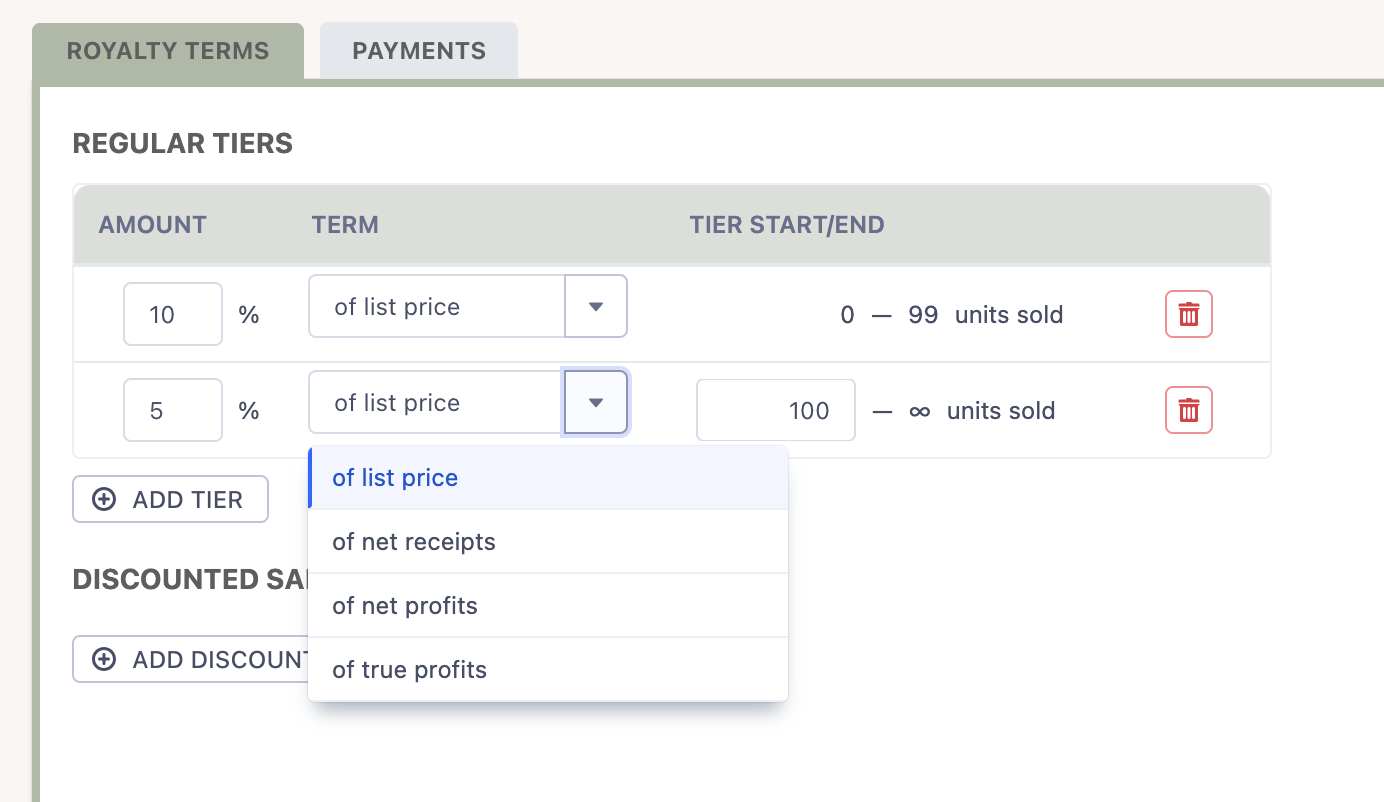
WorkingLit makes it easy to offer tiered royalties for a variety of terms.
You can have four kinds of royalties:
- List price, which is based on the cover price
- Net receipts, which is based on income you earn for the book
- Net profits is the same as net receipts, but you deduct expenses that are associated with the book before doing the calculation
- True profits is similar, but you’re basing it on your bottom line. This is also called profit sharing!
You can also add different royalty terms for heavily discounted sales, such as bulk sales or a book club.
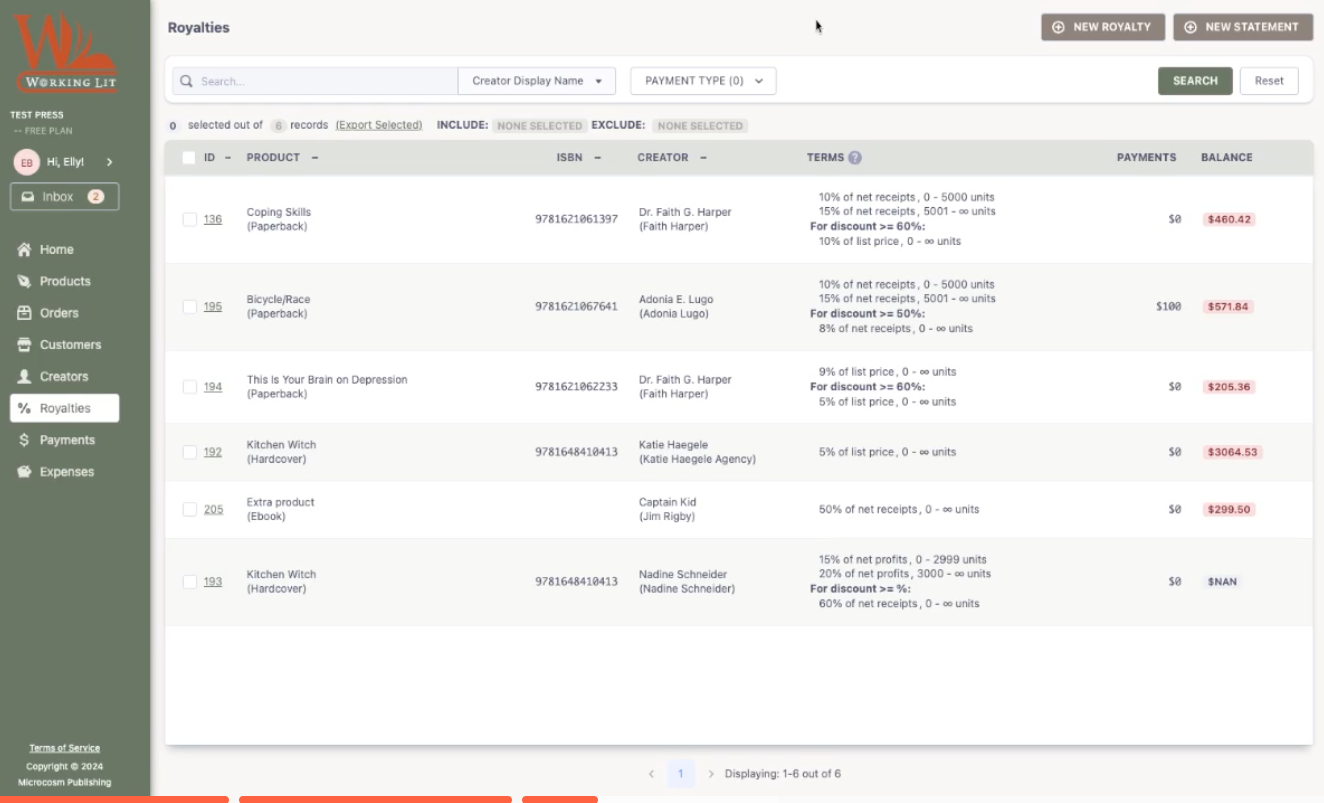
When you click back to your Royalties screen, you can see all the different authors and their terms.
Create a Royalty Statement

Click on NEW STATEMENT and choose your parameters (creator, date parameters, which products to include, etc).
You can choose to generate a payment record.
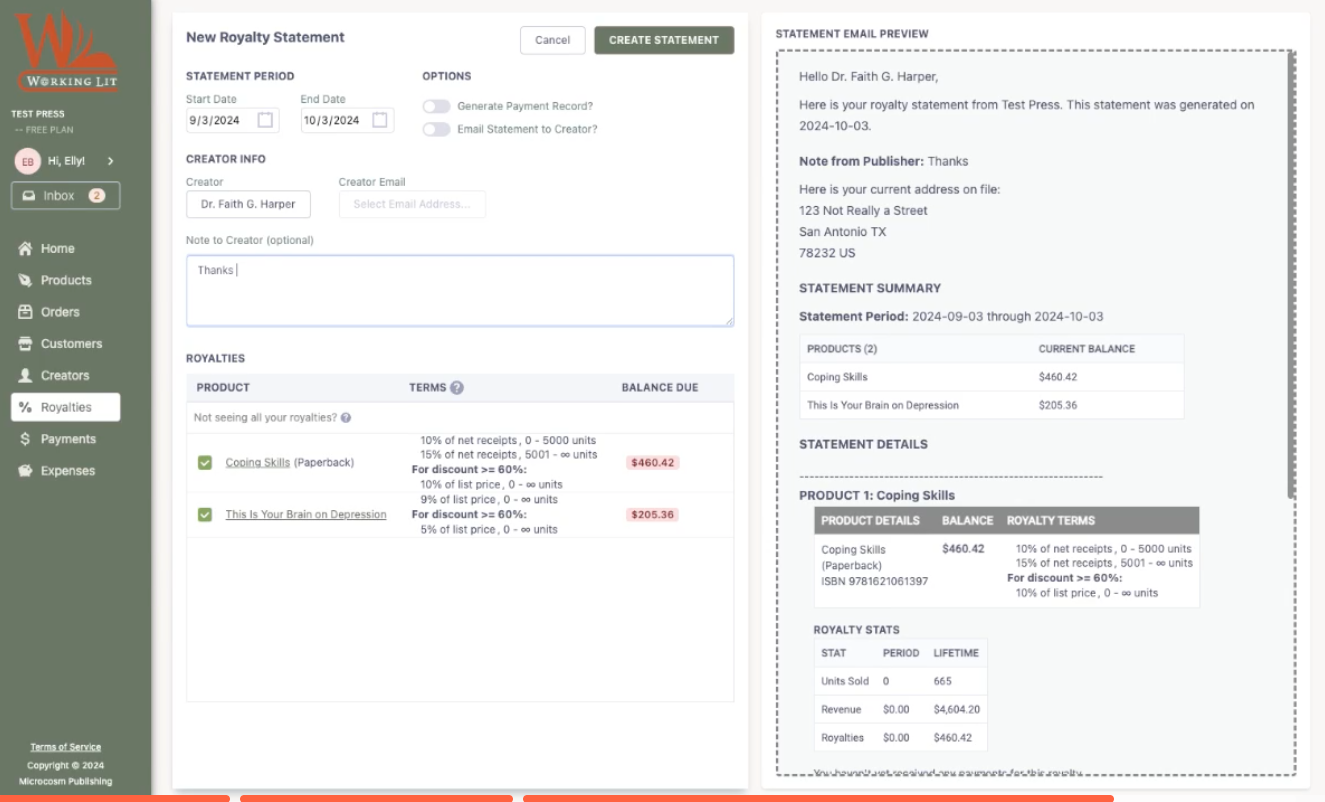
You can also email the creator in-app! WorkingLit generates a template email which you can customize with the Note to Creator section.
After you hit Send, they’re going to be able to see everything they need to know about the history of their book, what their royalty terms are, their current period and lifetime units sold, revenue, and royalties.
Reporting
Our newest section allows you to view your company’s financial health in one place.
Profit & Loss
Toggle time period by presets or custom calendar dates. You will be able to see a variety of revenue- and expense-based blocks.
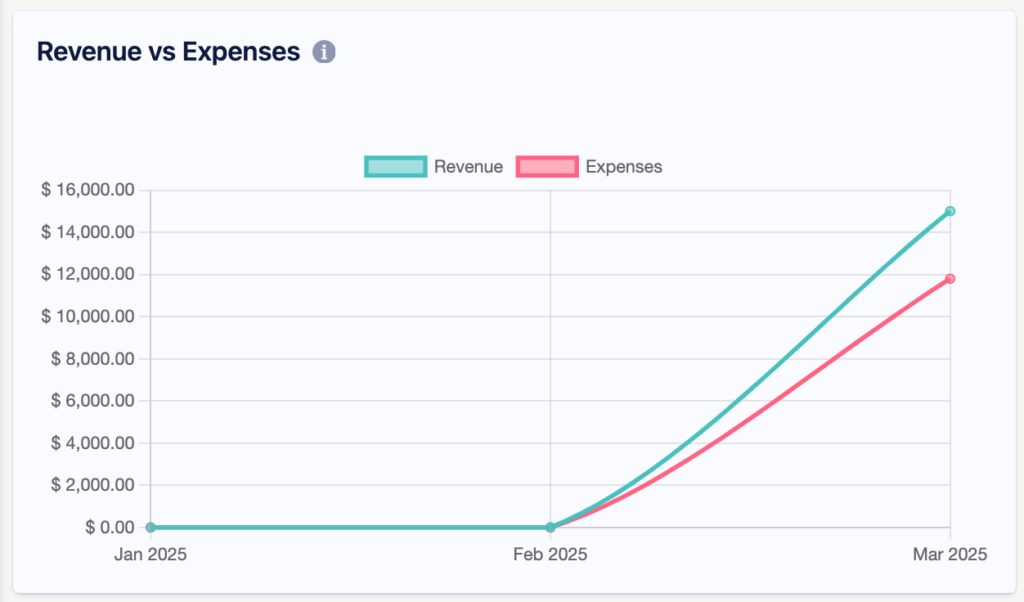
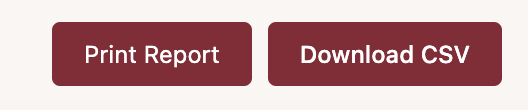
Scroll down to see a handy Financial Summary, and download a CSV or PDF file with the information!
Profit & Loss by Product
Choose one or more products to view all related expenses and sales. Toggle time period by presets or custom calendar dates. In the final columns, view the total product profit in your defined time period.
Top Products
View a list of your highest-revenue products, defined by a custom time period.
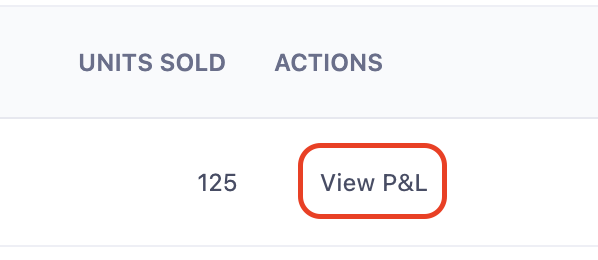
Scroll to the end of each row and click on “view P&L” to view that product’s Profit & Loss by Product.